|
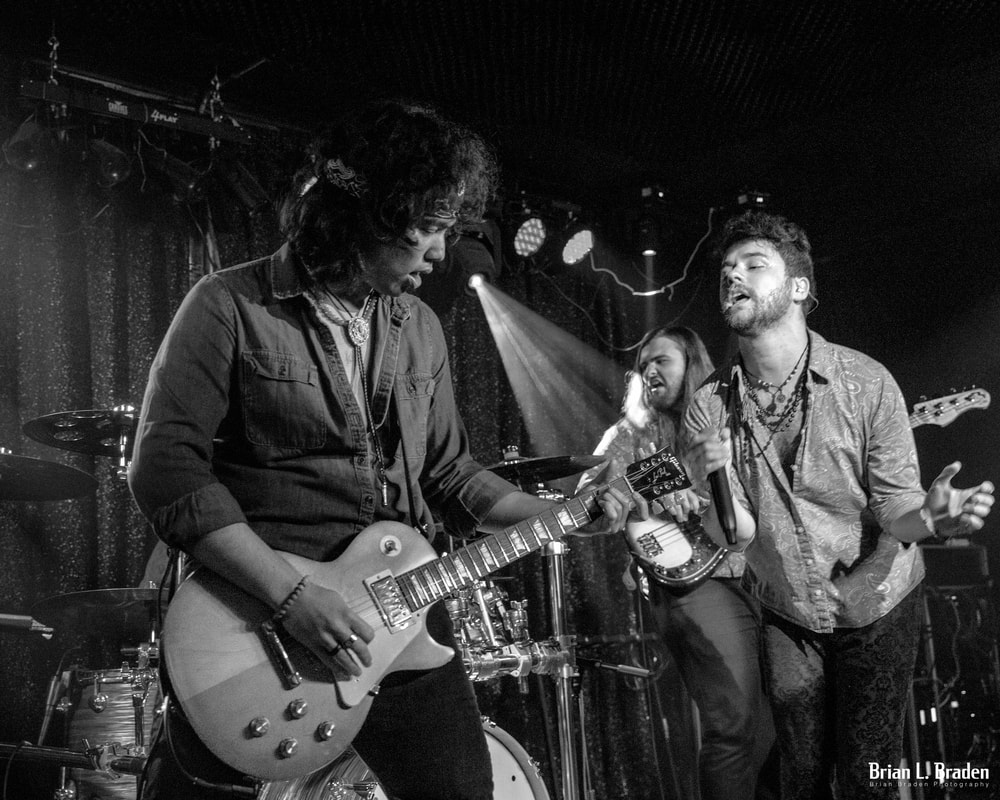
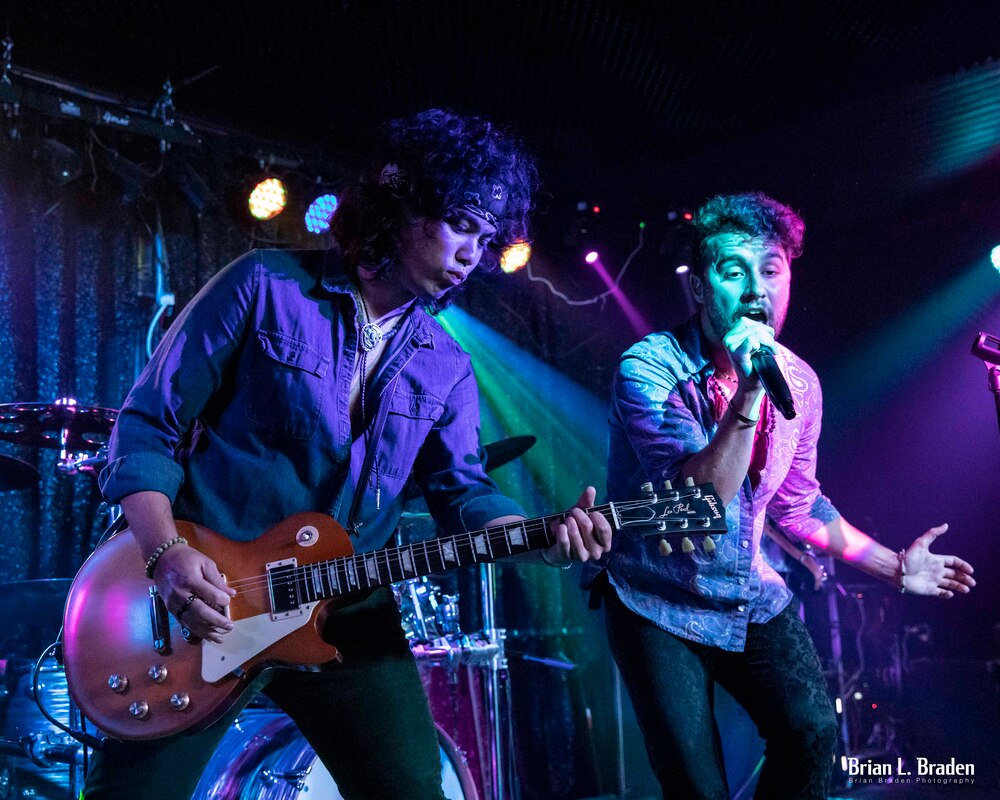
This blog post is for the photography buffs out there. Last weekend I had the honor of taking photos of Temple Monarc, a fantastic L.A.-based band with original music and a classic rock sound. Instead of just showing you some images, I'd like to talk about how I approach live performance photography. I learned photography primarily by taking live music performance images. Due to the dynamic challenges of light, subject and composition, it is a steep learning curve. It is a brutal way to learn the art, and I highly recommend it. Those lessons translate easily to any other genre of photography. I'd like to share some of those lessons-learned today, starting with equipment and settings. Equipment and SettingsEquipment I'm using a Canon 6DM2 with either a EF24-70mm or a EF17-40mm. Any DSLR or mirrorless will work as long as you can shoot on manual. Can you shoot on auto or with a phone? Of course, but you will eventually "peak" in your image quality. Here's why. Shoot on Manual You can't fully exploit the light when the computer does the thinking. There is so much more light the camera captures than what you see "straight out of camera" (SOOC). If you shoot on auto, the computer will either hide or throw that precious light away. Second, try to shoot with post-session editing in mind. When I see a composition, I've learned to see the light as I want it to be, not necessarily how the camera initially captures it and processes it on the display screen. This is where saving your image in RAW format is critical. Aperture I shoot at anywhere from f4 to about f5.6 because I want to strike a balance between low-light capability and reasonable aperture. For fast-moving bands, I don't like a lot of background blur. For slow-moving performers, and setting-dependent, I will go for more background blur. ISO Shoot as low-ISO as possible to reduce noise. Low-light forces higher ISOs, but I detest grainy images unless I intend to go mostly black and white. Low-lit clubs and music venues usually drives me to somewhere between 6400 and 12500 ISO. Shutter Speed I set my shutter speed as high as I can get it, even if that means slightly under-exposing the image. I won't shoot performer on low-lit stages under 1/125s. This keeps blurring down (unless I intend it). One can lessen the impact of under-exposing an image if you shoot with spot or center-weighted light metering. That means taking your light readings from the image cent er or where where your focal-point is. I use either of these settings depending on stage light conditions. I want my light-meter taking the light sample from where I want it, not where the computer thinks it should be. If the background darkens up, so be it. Focal Point Focal-point control is everything in rock & roll photography. Focal point drives composition! Use the smallest AF point your camera will allow, and make sure you understand how to dynamically change your focal-point quickly. If you let the camera control the focal point, you'll throw away a lot of images and miss a lot of great shots. Image Speed Set your camera to take multiple images at the highest speed. Also, make sure your data card is clear and ready for lots of images. All of this is important because of rock and roll. These settings give me maximum control of light and composition, and result in the best post-session editing options. Now, lets take a look at them in action. ApplicationThese two images were taken 30 seconds apart, yet that 30 seconds changes how each image was edited. In the first image, I chose black and white, yet in the second image I chose color. Why?
Subject & CompositionSubject and composition are directly tied to focal point. In both of these images I set up my focal point on my viewer's far right, with the intent of using the vocalist as my subject. Specifically, I am following the singer's left eye in both images. Based on my camera settings, the singer is the subject, I've automatically framed my composition, and light meter is reading the light reflecting off the singer's face. FOCAL POINT ANCHORS YOUR SHOT. Rule of thumb: The lower the light, the lower the aperture, and therefore the tighter the focal point. In image 1, composition and contrast are most important, so I selected black & white to accentuate this. In this instance, structure and subject interplay trumped color. Do you see all the triangles and arrows in Image 1? The bass player is visible behind the vocalist. The three performers heads form a triangle. Both he and the singer are facing the guitarist, who is looking at his guitar neck, which is pointed right at the lead singer (triangle) If you draw a line from the top of the singer's head to the bass player's head, it forms a line that points at the guitar (triangle) which points right back to the lead singer (arrow). If you look at the bassist's instrument, it protrudes from behind the singer on a straight line, as if the vocalist is being pierced (arrow) by the guitarist. The singer is looking at the guitarist's face, who is looking at his guitar, which points right back to lead singer (triangle). Now, look at the spotlight. It is simultaneously a triangle and an arrow piercing all the other triangles, and pointing at the center of all of Image 1's triangles - the guitarist's left hand. Leaving Image 1 in color, with all the different colored lights, would have been distracting. The image draws its power from composition, not color. Image 2 has a far simpler composition. Here, we have only one triangle. The guitar forms the base, and the performer's heads point to the apex. The bass player is hidden, and the image is uncomplicated, and color does not distract. LightIn Image 1, the lead singer's face is fully in the blue-green spot-light. Behind him, the bass player is visible, he is facing us, and his light source is the same color, and close in illumination, to that bathing the singer's face. Therefore, the camera handles the white balance for both performers the same. When converted to black and white, the two performers' faces will handle editing identically. The guitarist, however, is getting different light and the light metering is not "seeing" him. Therefore, he's darker. He is also dressed in a color similar to the stage lighting and blends in, but his guitar is more reflective and has a higher albedo. By going black and white, his guitar "pops" and forms a high-contrast bottom for several of the composition triangles. Bottom line, I get more bang for my editing buck for Image 1 in B&W, and Image 2 works as-is. EditingIn post-production editing, it quickly became clear Image 1 would have far more impact as black and white. Using the BW Mixer in Photoshop Camera Raw, I can covert colors into contrast. By increasing illuminance on aquas and blues, I can make the singer and bass player's faces brighter, as I can with the reds in the lead guitar. This reinforced the composition triangles and gives the image more clarity. Image 2 needed almost no editing, other than a change from 6x4 to 8x10. SummaryTwo images, 30 seconds apart. Same subject, same focal point, same settings, and two entirely different outcomes. I hope you enjoyed this week's blog. #photography #photo #camera #photoediting #photoshop #music #musicphotography Please join me on my journey. If you enjoyed this blog, please like the post and leave a comment or if you're feeling brave, share it on social media. This platform is my entire advertising budget and is how I share the word on my books. Also visit my Facebook, my author page and check out my fiction books here book here.
0 Comments
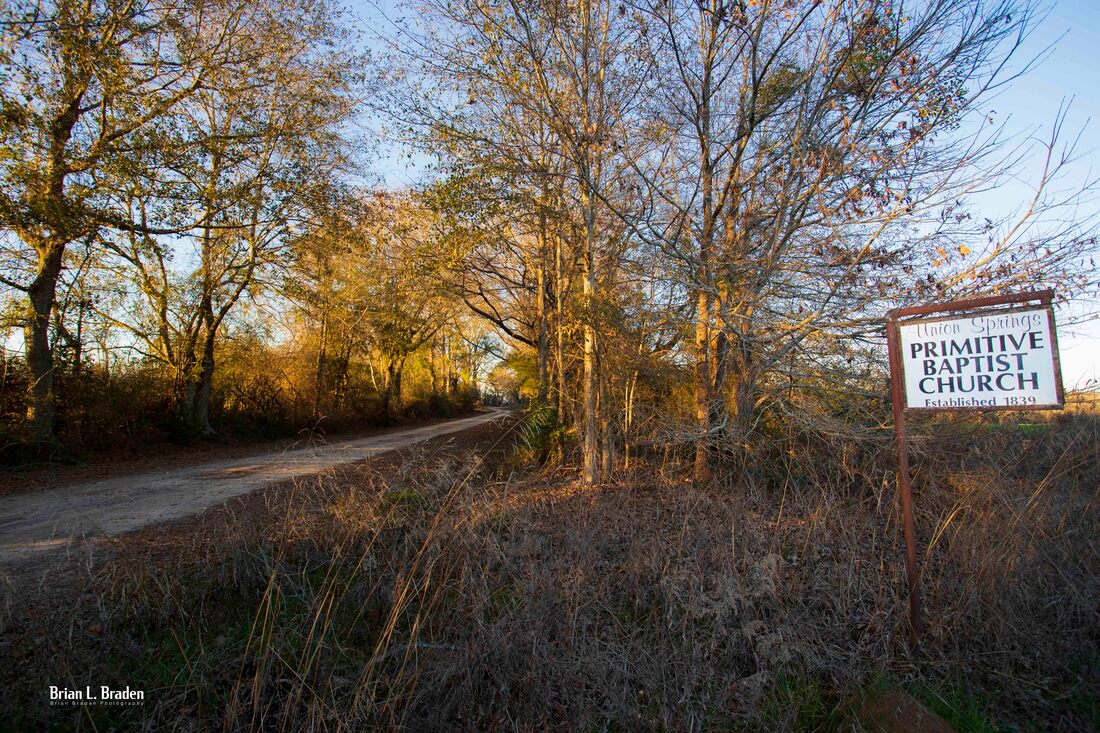
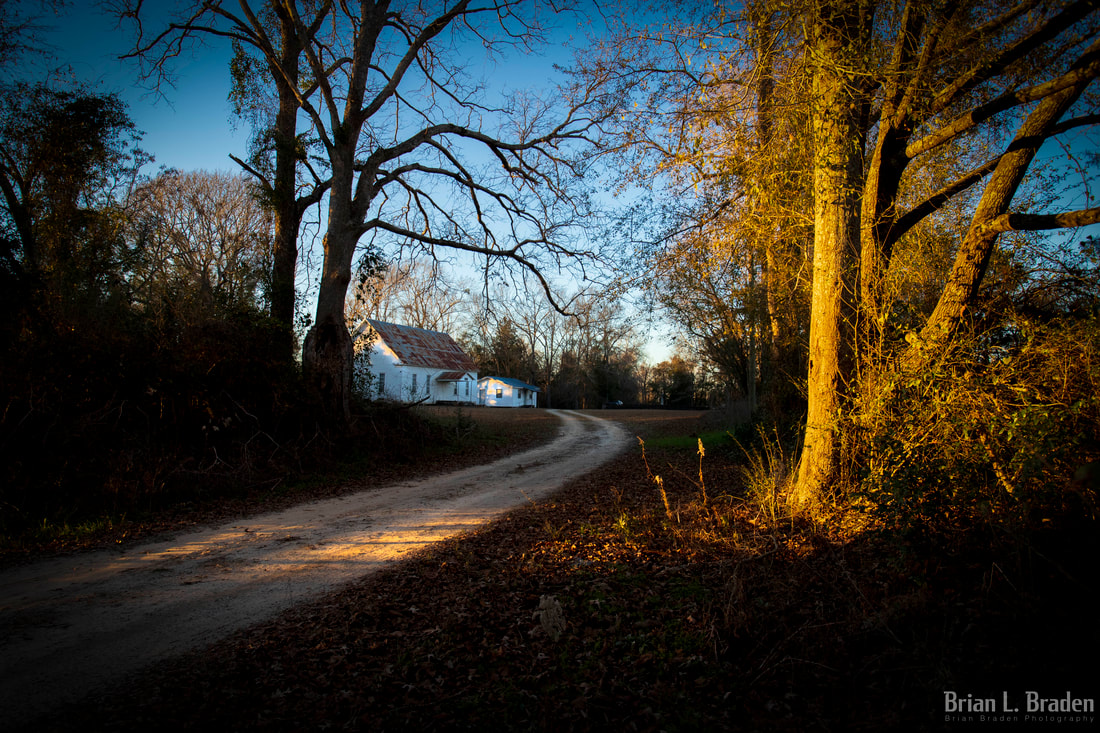
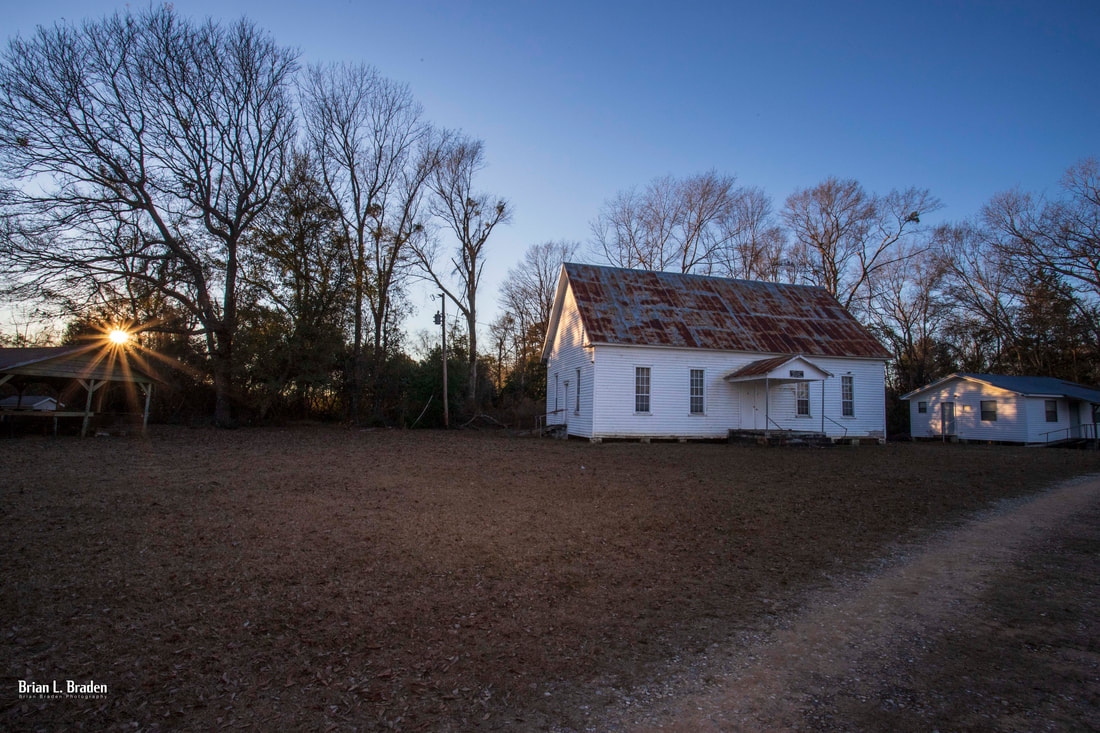
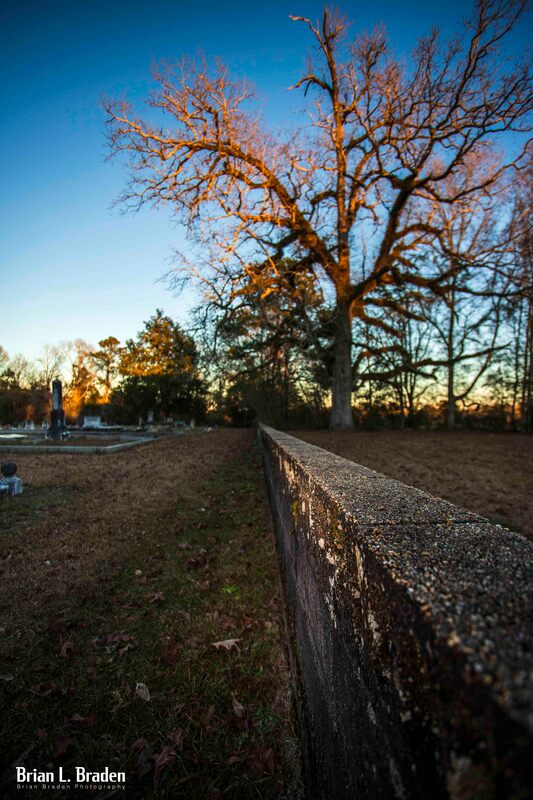
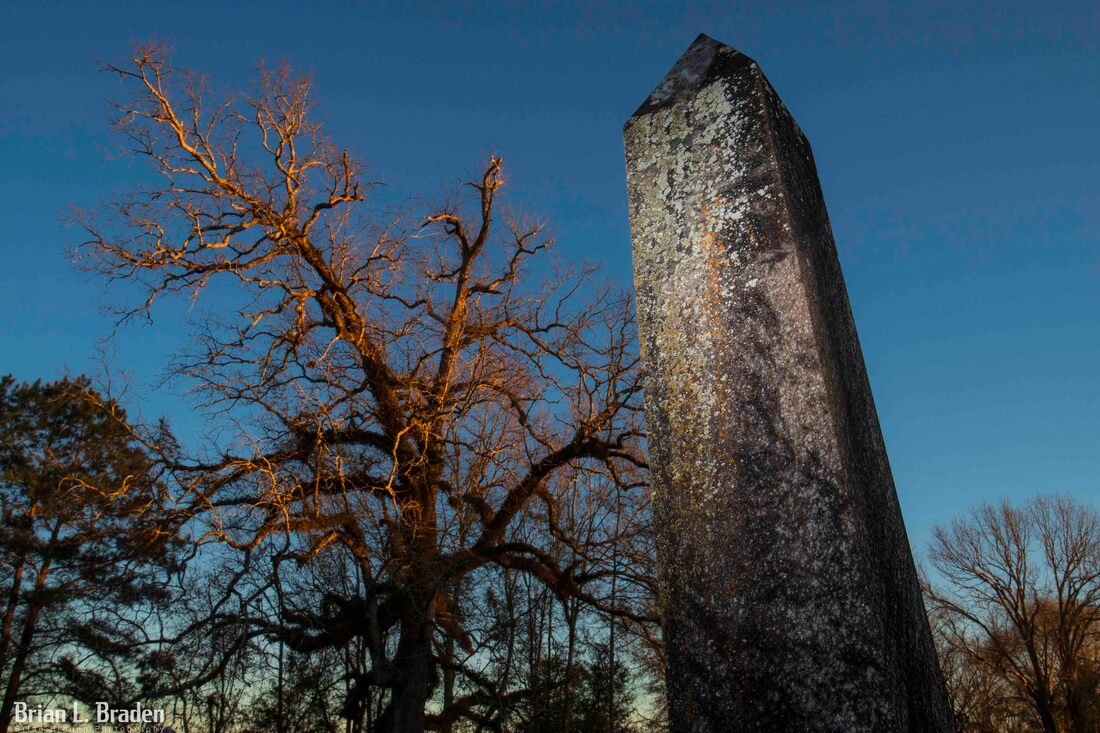
A tip led me on a January journey into Pike County, Alabama. I was looking for an old church. Sunset was fast approaching, and I was beginning to lose hope I'd reach it in time to get any good shots. Sure enough, it was right where I was told. I can find very little about Union Springs Primitive Baptist Church online, other than it exists. However, its clearly taken care of, including the adjacent graveyard. By the looks of it, there may still be services conducted here. The first thing I noticed was the long dirt lane leading off the main road. The sunset light here is spectacular, and I am positive the sunrise will be equally spectacular. I spent as much time taking photos of the lane as the church. This is a beautiful place. I will return to this place at dawn. I'm sure the church, with its eastern exposure, will light up in the sun rise. Does anyone out there know the history of this place? If so, please leave a comment. #photography #rural #church #oldchurch #alabama #pikecountyalabama #primitivebaptist #canon #canonphotography #canon6d If you enjoyed this blog, please like the post and leave a comment or if you're feeling brave, share it on social media. This platform is my entire advertising budget and is how I share the word on my books. Also visit my Facebook, my author page and check out my photography book from America Through Time, "Abandoned Wiregrass: The Deepest South's Lost and Forgotten Places."
 As promised, here's my shots of the L.A. band "Temple Monarc" from their October 2nd appearance at Harlow's in Ozark, Alabama. However, I wasn't the only photographer there that night. My friend Savanna Kirkland of Embrace Photography was also there. As the wife of "MidLife Crisis" bassist Ken Kirkland, Savannah is keyed in to the local music scene. She takes some incredible photos, and I was excited when she agreed to let me post her images from that night. Here's a little about Savanna and Embrace Photography in her own words:  "My name is Savanna and I started Embrace Photography because of my love to catch the "moments" of live action photography. I specialize in live music performances by showcasing the musicians energy and love of their craft. My goal is to capture the musicians emotion that allows my audience to feel that they were a part of the performance through my photos." The slideshow intersperses Savanna's and my photography to give the viewer some idea of the great show and energy on stage that night. Thanks to Live at Harlow's for letting us take photos. Located in downtown Ozark, Harlow's does an amazing service by bringing great music to the Wiregrass, including acts from across the region and US. Please check them out and support local music! Please visit Temple Monarc's Facebook as well and check out their great music. Enjoy! music #photography #musicphotography #liveperformance #canonphotography #rockandroll #liveatharlows #templemonarc #embracephotography *** If you enjoyed this blog, please like the post and leave a comment. Also visit my Facebook, my fine art photography and check out my photography book from America Through Time, "Abandoned Wiregrass: The Deepest South's Lost and Forgotten Places." 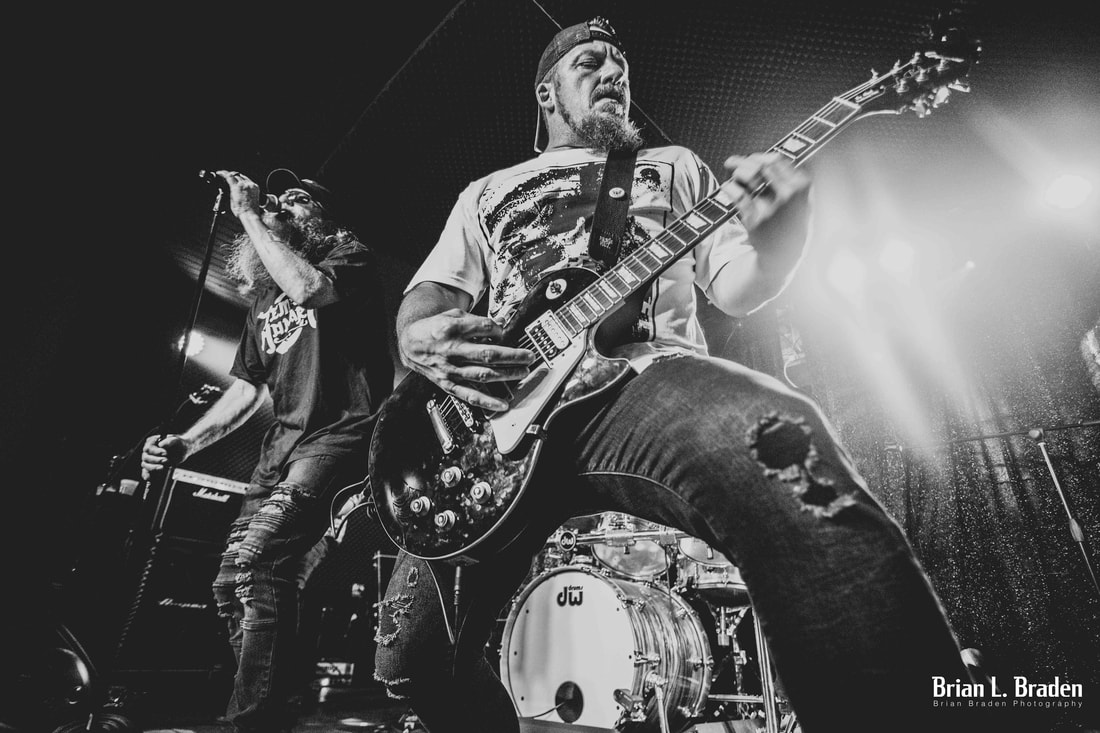 I love rock and roll photography. It's addictive, a serious rush, especially when the band knows how to put on a show. Last weekend at Harlow's in downtown Ozark , Alabama, the band "Midlife Crisis" put on a great show. I liken live performance photography, most notably high energy music like rock, to a high intensity workout. It builds one's skills and quickly highlights a photographer's weaknesses. The floor is crowded with people who want to see the show, not a photographer's back. If you can keep up with fast moving band in a dark venue with constantly changing light conditions, those skills readily translate to other subjects in challenging conditions. I try to come out of every live performance session with a list of lessons-learned to carry to my next session, whatever the subject may be. Sometimes, if the band is really good, I find myself pulsing to the harmony, my Canon's shutter clicking to the beat. It's a great feeling capturing photons in sync with the rhythm. Last Saturday was exactly like that. Here's some of my favorite shots from Midlife Crisis, Live at Harlow's on 2 October, 2021. #music #photography #musicphotography #liveperformance #canonphotography #rockandroll I promised to talk about composition this week. I've been dreading it. Why? Because one cannot discuss composition without talking about THE RULE OF THIRDS. Every photography blogger, tutorial, video and expert on the interwebs has talked about the Rule of Thirds. There isn't much new to cover in this area, so I'll cover it my way - short and to the point.  Most cameras and phone cameras have options for placing a Rule of Thirds grid on your view finder or screen. The Rule of Thirds dictates that its best to put your subject in one third of your composition (one side or another), and leave the other two-thirds open. That's it. It's nothing more complex than that. Experts say this provides balance to your composition. As crazy and as simple as it sounds, it works. It's been proven repeatedly using this basic ratio for composition provides a more balanced and pleasing image. Why? Some say it has something to do with The Golden Ratio, which is a mathematical ratio of roughly 1.61. When you do magic math stuff it creates a spiral like the one below. Scientist and other smart people say The Golden Ration is present everywhere in nature, and generally God thought it was a good idea. Notice, the spiral tightens in one third of the image. Essentially, the ROT and GR are expression of the same thing. 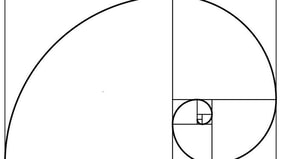 This is a visual representation of Golden Ratio. Some cameras give you the option to use a GR grid in addition to a ROT grid. This is what you need to know about to use these composition tools. 1) Your camera or phone likely has a menu function to place a grid or ratio image in your viewfinder or screen. This will allow you to template your image. 2) You can also set the manual focus points on your camera to focus your subject on one side or the other. This will ensure you are using the ROT and to make sure you're focused on your subject. We'll cover these tools in future blog posts. 3) You can also crop an image to get the ratio correct, but that is a last-ditch move. Cropping degrades your image quality. Its best to get the ratio correct when you take the image. Why do I think ROT is important? Using this ratio allows the photographer to set up their subject and give it context. It allows you to frame your subject, and provides room to "dress" up the subject with light, context, leading lines, or powerful settings. IT GIVES YOU ROOM IN YOUR IMAGE TO TELL A STORY. That's it, the Rules of Thirds in a nutshell. I'm going to leave you with one of my images which I think demonstrates the ROT. Notice the vase is the subject, and its center occupies the left 1/3. It is the focal point. The vineyard provides both context and leading lines. The hills beyond bisect the vase's top, which then leads you to the vineyard, which leads to the vase. The bush isn't ideal, but sometimes ideal isn't possible. However, the bush does provide balance and blends with the greens so isn't so noticeable. It also leads your eye back to the vase. See you next time.  "Soda Rock Winery #5, 2021. Canon 6D, 70-200@154mm, f14, 1/640s, ISO800, partial metering. ***
If you enjoyed this blog, please like the post and leave a comment. Also visit my Facebook, my fine art photography and check out my photography book from America Through Time, "Abandoned Wiregrass: The Deepest South's Lost and Forgotten Places."
I've decided to try something different on Photography Phridays. When I'm not actively blogging on a topic I'll debut my images here first. Today's debut, "Driftwood Portal" comes from my recent trip to the west coast, specifically McVeay State Park in Oregon. An interesting tidbit about this image, there was a whale not far beyond those rocks.
We'd stopped here on chance, and I spent an hour looking for the right shot. As it happens, the Gray Whales had begun their annual migration. This was the first time I've ever seen a whale. We spent another half hour just standing on the cliffs, watching. I never got a good photo of them, but that doesn't matter. The experience was amazing. You can find this image, and the rest of my gallery, at Fine Art America. #photography #gallery #sunset #beach #coast #Oregon #driftwood 
PHOTOGRAPHY PHRIDAY, EP 5: SUBJECT, PART 2. Focal Point and Depth of Field as it relates to Subject.9/17/2021 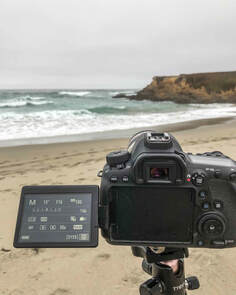 The concept of subject isn't a simple as it sounds. The concept of subject isn't a simple as it sounds.
We talked last week about subject. Subject is what you are photographing. It’s what you want the viewer to see. Everything else in the image supports the subject. It could be the tiniest insect, a child, a bride, or the Grand Canyon.
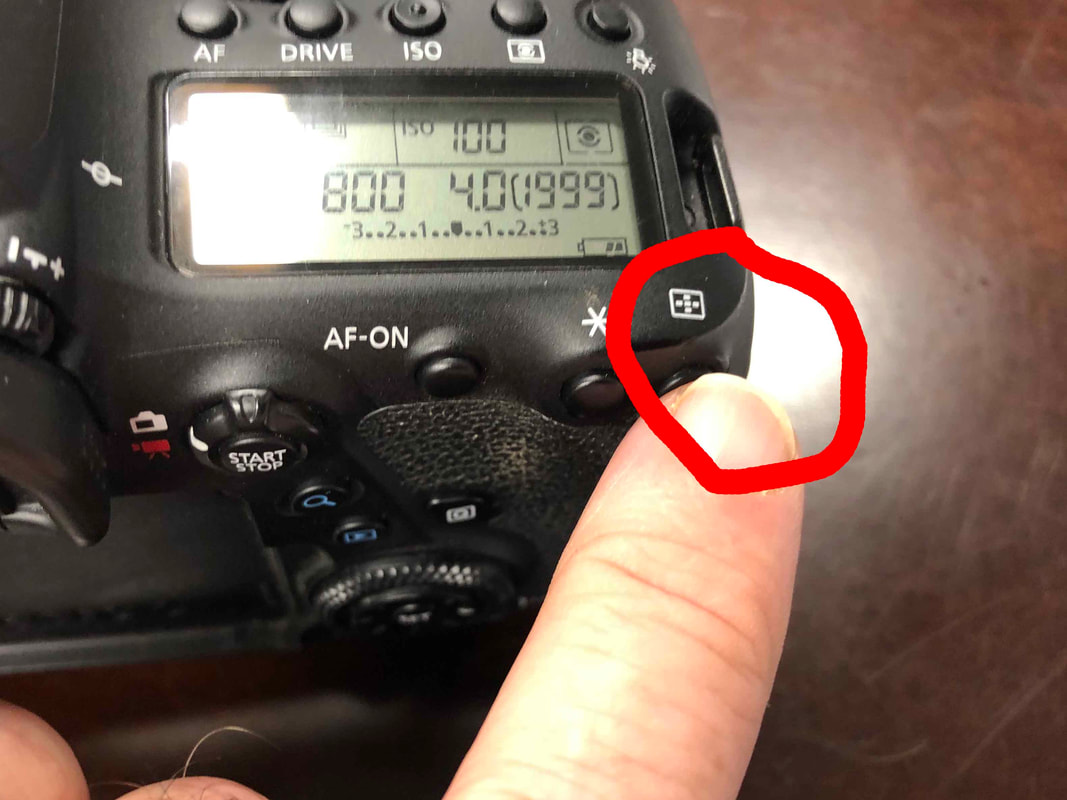
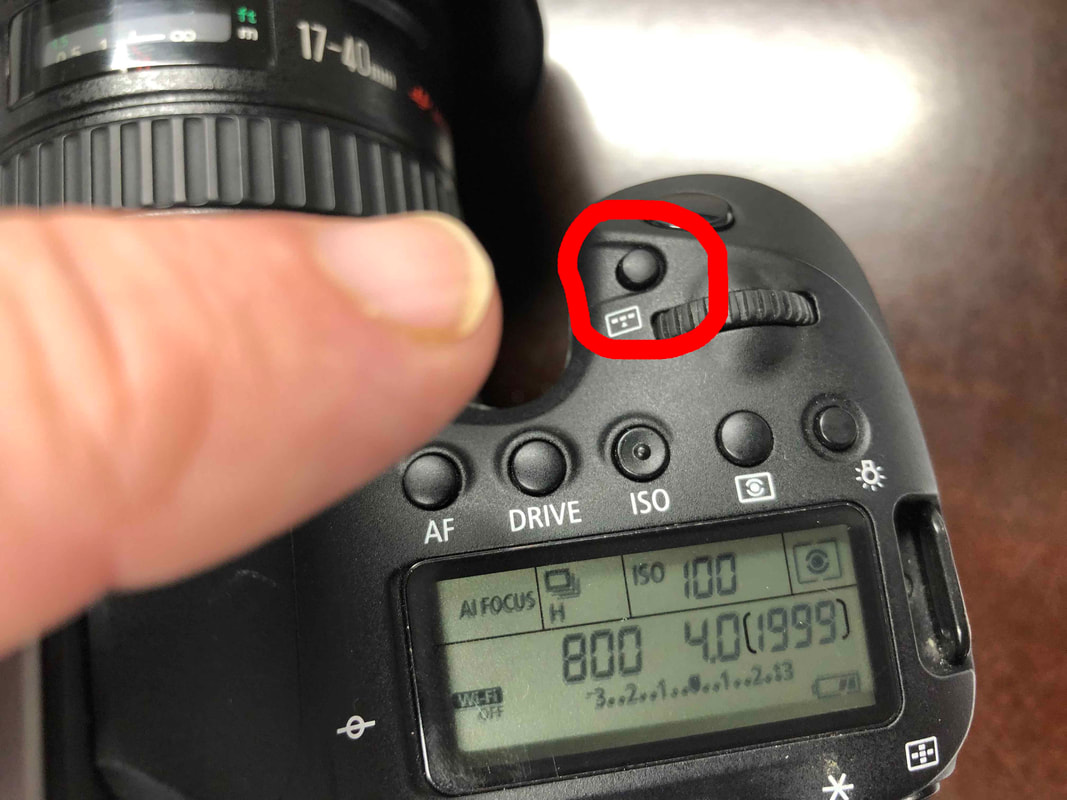
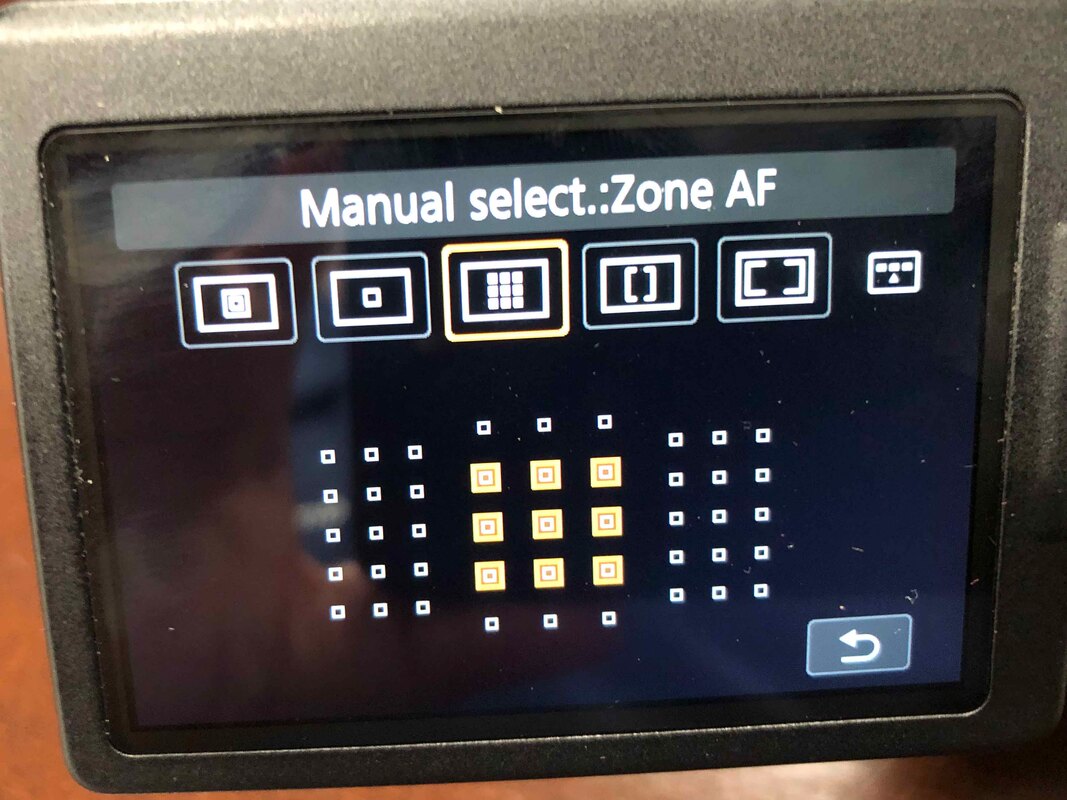
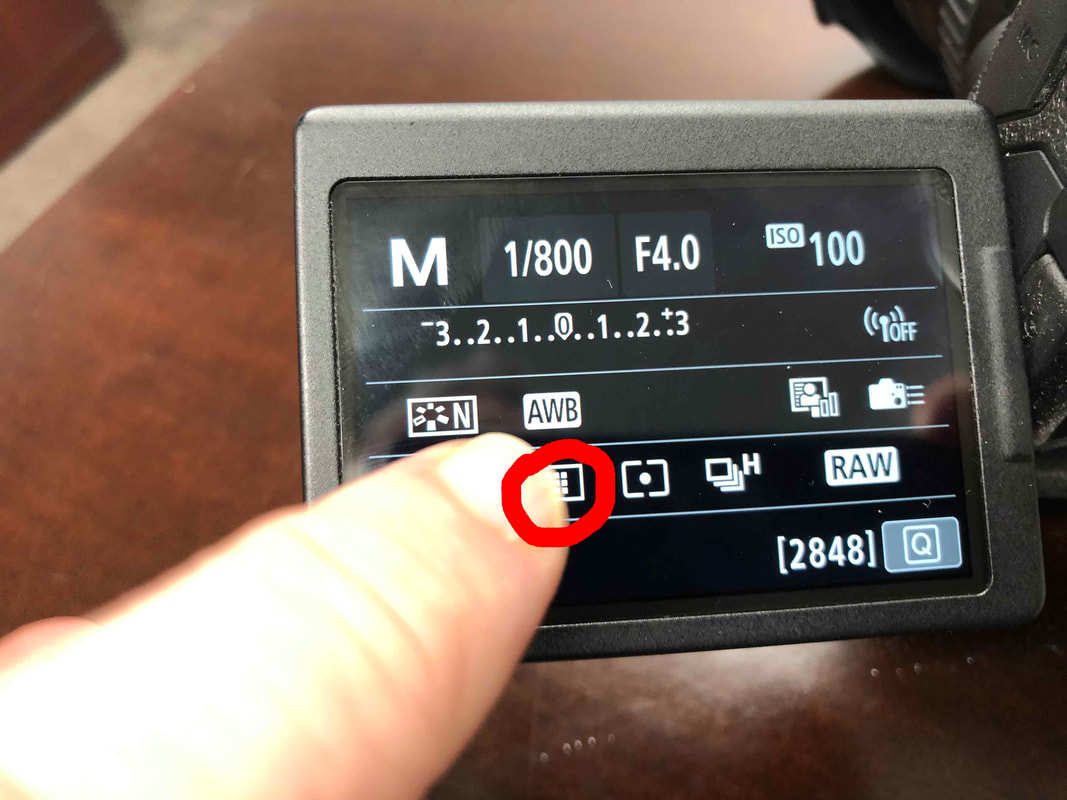
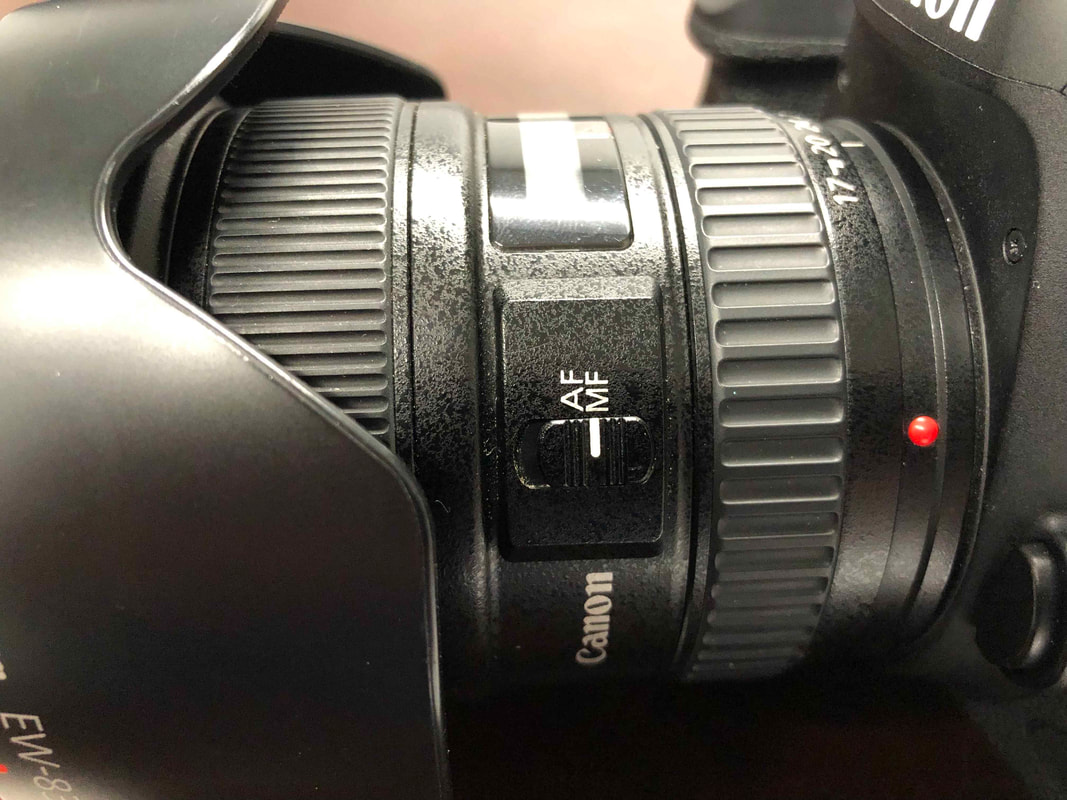
Here’s the first question you should ask: “What is my subject?” On the surface, it seems like an easy question to answer: it’s a person or defined object. I recommend tweaking that question to “Where do I want my viewers eye drawn?” Your subject might have a subject! Is it the model’s stunning eyes? Is it your child’s beautiful smile? Is it a lone tree out on a prairie? Is it one person in a crowd or the crowd itself? Is it the tree or the beam of light shining through the branches. The subject’s subject is where you place your focal point. There is a relationship between focal point, depth of field and your subject. That relationship will determine your first camera settings: focal point and aperture. Focal point is that box, boxes or dots that blink around the area when you point your phone camera, or the boxes that blink when you press your shutter button on your DSLR or mirrorless. If you’re shooting on a phone, or in auto, the software will determine your focal point. This can be good and bad. Good it you have to get the shot quickly, bad if the device picks a spot you don’t want. I highly recommend taking control of focal point. Don’t let your camera pick it for you! If you have a DSLR, there will be a button somewhere on your camera or as a part of your control screen that allows you to take control of you autofocus point. Controlling the focal point is the first step in mastering your camera and getting the image you want. Cameras come with more than one focal point and it doesn’t have to be in the middle of the image The more advanced the camera, the more auto focus points it has. Press the focal point button on your camera (the image I show is on my Canon) and start playing with adjusting its size and placement. It will differ from camera to camera. There are plenty of videos on Youtube that can teach you this depending on your model. If you really want to get creative, turn off the autofocus entirely and use the manual focus ring on your lens.
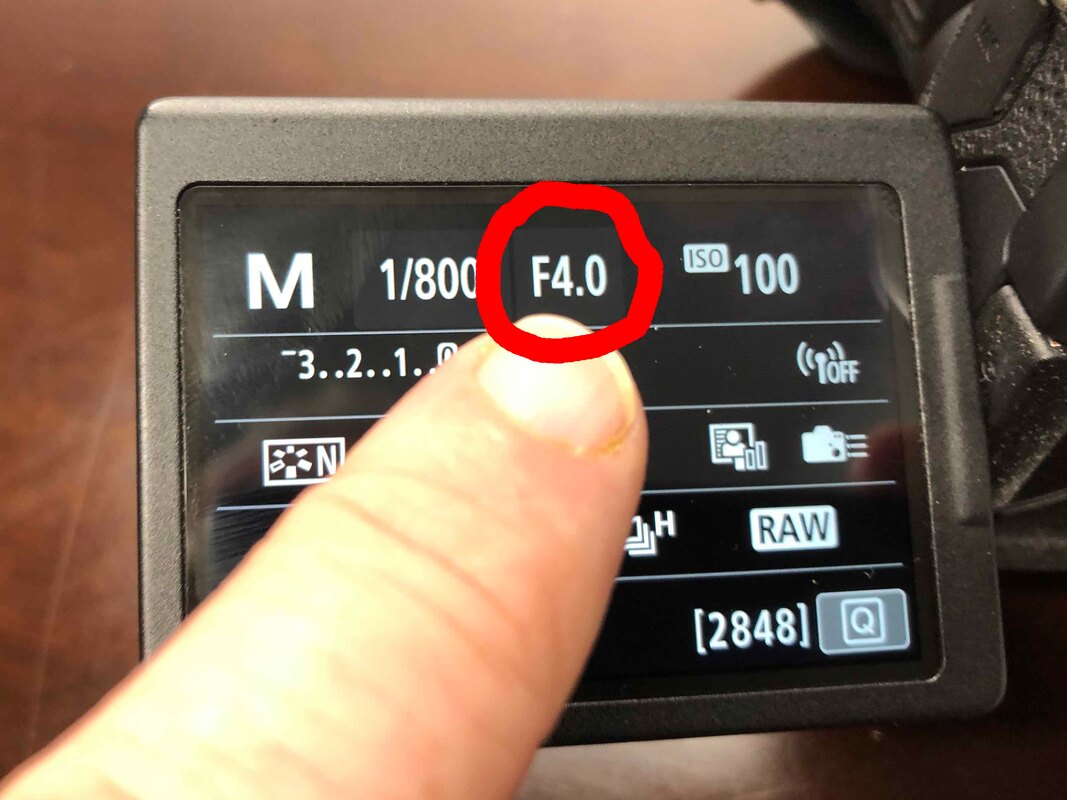
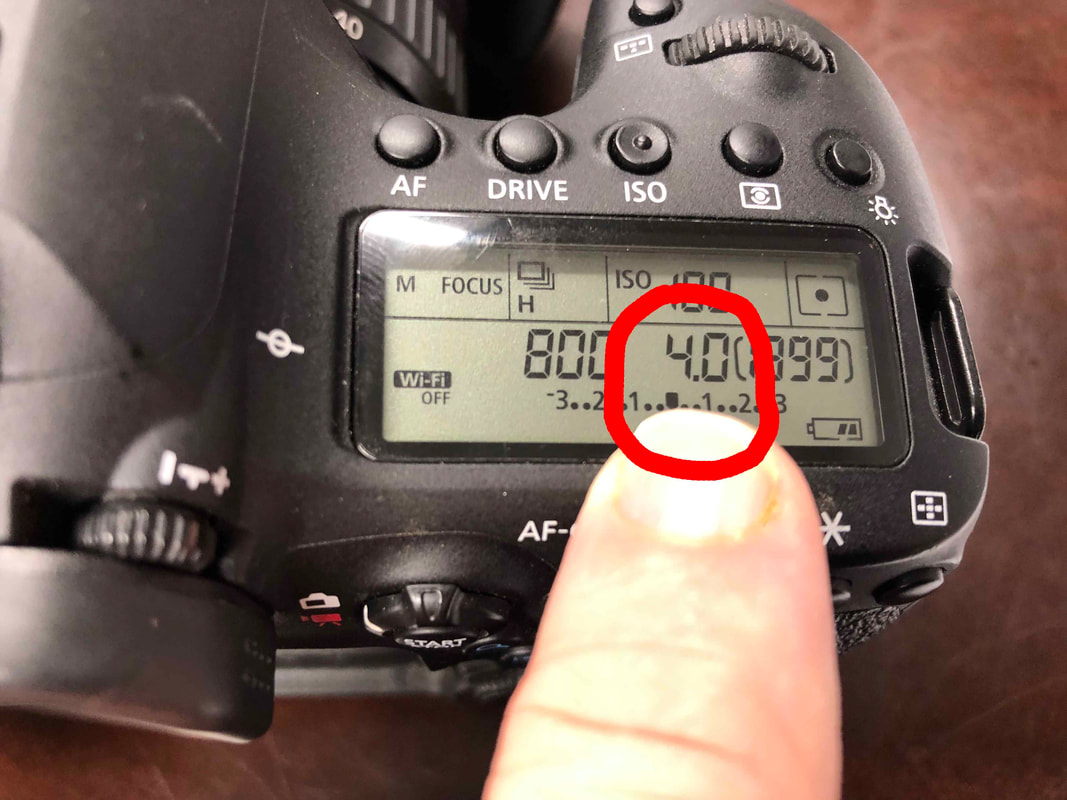
Aperture is depth of field, or how much of the image is in focus. This is measures by the “fX.X” number on your lens. There are lots of factors regarding aperture, and we won’t get into all of them today. The lower the f number, the blurrier everything gets outside your focal point. The higher the number, more of the image is in focus. It’s more complicated than this, but this gives you the basics. Here’s the important part: If you are shooting below about f7.0 you better know exactly where your focus point is, or your subject may be blurry.
Here are some examples of focal point and aperture in my own photography. This landscape is a wide angle shot (18mm) with a wide depth of field (I seem to remember about f7.0). The focal point & subject are the barns, but I wanted a great deal of the field is in focus, too.

This photo has a narrow depth of field (f1.8) and a tighter focal range (50mm). This called for a precise focal point on the flower's stamens (my subject's subject), and letting everything else blur into shadow and color.

The rule of thumb I use is the more shallow the depth of field the smaller you want your focal point, such as using only one point or block. If you are doing broad, sweeping landscapes at deep depth of fields you want a broad focal point. The auto focus points don’t have to be in the middle, either, but we’ll talk more about that when we get to composition another day.
If you want close up and intimate, then you want wider apertures, like f4.0 or lower. This will concentrate the viewer on one spot and let the rest of the universe melt away. If I have a zoom lens and I’m using it at high, tight focal lengths, I usually also want to use lower apertures. So to recap, a good rule of thumb is the tighter, closer and more intimate the shot, the smaller your focal point. This allows you to focus exactly on what you want. The wide, broader and larger the subject, the bigger the focal point. These are guidelines, not rules. So to recap: 1) Control your focal point. 2) If your depth of field is shallow, use a more precise autofocus point. 3) If you are zoomed in, use a smaller focal point, too. 4) Loosen up the focal point as you zoom out and as you depth of field increases. These are the first steps to ensure your subject is what the viewer’s eye is drawn to. Next time, we’ll discuss subject as it fits into composition. Next time we talk, we’ll start bringing composition into the mix. Thanks for stopping by! *** If you enjoyed this blog, please like the post and leave a comment. Also visit my Facebook, my fine art photography and check out my photography book from America Through Time, "Abandoned Wiregrass: The Deepest South's Lost and Forgotten Places." #photography #subject #photographytips #tutorial #photographytutorial #howto #photographylessons
Before I go into detail on the topic of subject in photography, I'd like to show you a few example of subjects in my photography. Simply put, subject is what you are shooting. It's the photos topic, its theme. It could be anything, but it's purpose it to draw a desired reaction from the viewer. It should conjure a desired emotion, idea or concept. For portrait photography, the subject it easy - it's the person you're photographing. For landscapes, it may be more difficult to pin down. My rule of thumb in defining subject in my photos is easy - where is my focal point AND where is the composition leading the eye. Where do I want the viewer to be drawn?
In the first photo below, "The Gyro Captain", my focal point and subject it the pilot himself. Everything else in the composition supports the subject. In my second photo, "The Boy Scout", it's the boy in black and white, not color. Why? The reflection is a leading line drawing the eye to the black and white image, which is where my focal point is. In "The Remembered Aviator" I use both focal point and composition to frame the statue, which is the subject. In "Abandoned Wiregrass" I use the rule of thirds and focal point to place the shack in the reader's attention. That's all for now, more on subject later. Next time I'll dive into detail on the basics of defining subject in your photo. If you'd like to see more images please visit my gallery here. #photography #subject #photographytips #tutorial #photographytutorial #howto #photographylessons 


 TEACHING MY SON A LITTLE ABOUT PHOTOGRAPHY TEACHING MY SON A LITTLE ABOUT PHOTOGRAPHY Welcome to back to Photography Phriday on The Illusion Exotic. I was going to discuss lighting this week, but instead I’m going to take a detour based on a question I often get.
“What kind of camera do you recommend?” If you’re asking this question, it probably means you’re a beginner and thinking about buying something that looks like a professional camera. That’s not an easy question, nor a short answer. But I’m going to give it my best shot in five parts. Answer 1: The camera you own right now. By this I assume you have a cell phone that takes photos. Before you move on to an expensive digital single lens reflect (DSLR) or mirrorless camera, squeeze as much learning and experience as you can out of your phone camera. Specifically, get comfortable with the aspects of Subject and Composition. One doesn’t need a complicated camera to hang of these two critical elements. If you want to know more about them, check our last week’s blog. Camera phones are getting pretty advanced in both photo quality (megapixels) and software. Some apps let you control aperture, ISO and shutter speed. However, having to control all that from the screen can make the experience clunky. Chances are, you’ll eventually drop your phone, too. If you stick with photography, eventually you will have to move beyond the phone, which leads to Answer 2. Answer 2: The camera you can afford. If able, buy used. There is a good chance someone you know has DSLR they bought a few years ago they don’t use anymore. They flirted with photography, and then found it wasn’t their thing. It’s probably in the back of their closet, still in a nice carrying case. It has a few extra batteries and maybe more than one lens. Maybe they’ll sell it to you cheap, or even just give it to you. Look online, too. You’ll find LOTS of entry-level Nikon and Canon cropped-sensor cameras (and their EF-S series lenses) for sale in your local area. These could be those cameras that were once forgotten, or maybe the photographer recently upgraded and is looking to sell their old kit. If you ever get serious about photography, you have to get serious about buying used gear. Photography is an expensive hobby. Answer 3: The camera that will teach you the most. A good entry-level cropped sensor camera, like a Canon “T” series Rebel or a Nikon 3500 families of camera bodies, have almost all the functions of higher-end models. They have smaller sensors, lighter camera bodies, a few less bells and whistles, and come with far less expensive lenses. However, what you learn on them directly translates to more capable cameras. In essence, they will become your teachers. You can buy diverse lenses, accessories like external flashes and learn how to use them without breaking your budget. You’ll learn what all the buttons mean, how to shoot on shutter-priority, aperture priority and, eventually, full manual. You’ll learn how to manually control focal points, and focus itself. You’ll also learn how to switch lenses. Most importantly, you’ll get comfortable exploring your camera and making mistakes. Answer 4: The camera you’re most comfortable with. This goes back to the two previous answers. Once you have a camera, it will probably drive your camera choices from that moment forward. If you start with a Canon, you’ll probably stick with a Canon. If you start with a Nikon, you’ll probably stick with a Nikon. That’s why I recommend buying cheap and used to begin with. If you happen to fall in love with a different brand (like a friend’s camera) it’s easier to walk away from a small investment than a big investment. Also, in my opinion, it’s easier to take great shots with a less capable camera you are comfortable with than an expensive model you don’t fully understand. I started with Canon, and I’ve stuck with Canon. I know Nikon photographers who have done the same. Answer 5: The camera you have with you all the time. If you don’t carry a camera with you, you’ll miss opportunities and kick yourself for it. That’s why phone cameras will ALWAYS be useful. However, if you have the time, reach for your DSLR/Mirrorless so you can make the shot really count. I never got rid of my first cropped-sensor Canon T5 camera, and I always keep in my car no matter what. Time and time again, having it with me has paid off. It’s not near as capable as my Canon 6D, but its capable enough. I know the buttons, the menus, the way the focal points work, and it feels right in my hand. I love it and will keep it until if falls apart. When it’s gone, I’ll find a nice used Rebel to replace it. There it is, my advice choosing a camera. Use camera you own right now to learn what you can, look for a camera you can afford, get a camera just advanced enough to teach you what you need to learn, find a camera you’re comfortable with, and then take it everywhere. #photography #tips #photographytips #photo #cameras #canon #nikon #creativeauto #cameratutorials 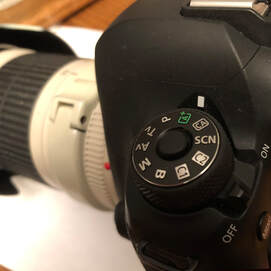 Welcome to Photography Friday on The Illusion Exotic. No, this article isn’t about the band REM or 80s music. It’s about taking your first steps into photography.
Let’s say you bought or were gifted a DSLR (digital single-lens reflex) or mirrorless camera. Maybe you were just curious about the technology, or simply wanted to take nice photographs of your kids. It may be a Canon, it may be a Nikon, or a Sony or a something else. It could come with interchangeable lenses. It might be a what’s called a “cropped sensor,” “full-frame” or maybe it’s a high-end mirrorless. Maybe you don’t know, and maybe you don’t care. You’ve read some of the instructions, and you’ve watched a few YouTube videos. You’ve got a few hundred to a few thousand dollar’s worth of camera in your hands, and you haven’t managed to move that little dial on the top off of “A” yet. By “A” I mean you’re still shooting in Automatic. Everything you’ve read and watched says you should be shooting in “M”, the Manual mode. I mean, the tutorials say you’re not a real photographer if you’re shooting in Automatic, right? You want to shoot in Manual mode, or maybe one of those other complicated modes (“T” and “S” or whatever your model calls them, but its’ all so complicated, your life is busy, and you really don’t have the time to learn. You just want to take good photos. Many of the blogs, articles, photography denigrate the Automatic mode, and relegate to a place of shame. Take a deep breath and relax, and embrace the “A”, at least for now. Automatic mode takes care of the hard parts of being a photographer. The computer built inside your camera takes care of everything except pushing the button. Details change slightly from camera model to model, but in Automatic your camera handles focal point and the light triangle (aperture, shutter speed and ISO). Your expensive, high-tech camera becomes a glorified “point and shoot”. And that’s a good thing, because you paid for it. It’s okay to spend some time in Automatic before you move on to your camera’s more complex capabilities. There are two critical elements you should learn and become comfortable with before moving off of Automatic to the other modes: Subject and Composition. Subject is what or who you are photographing, and how you are trying to use the subject to elicit a reaction from the viewer. In my opinion, subject is the most important way to connect with the viewer. For example, if you are taking photos of your kids, then your kids are the subject. They elicit the reaction. Subject can immediately draw someone into your photograph, or turn them away. Powerful subjects can overcome poor composition, but usually subject and composition are woven together into a whole. Here’s a YouTube video on selecting subjects for photography. It also delves a little into composition. Composition is simply how you frame and set up your shot to draw attention to the subject. Its where and how you place your subject in the scene. Once again, there are plenty of free tutorials online that teach composition. You’ll learn tried and true techniques like “golden ratio” and “rule of thirds” that help you set up your shot. Here’s a YouTube video talking about composition. That’s the great thing about Subject and Composition, You can learn much about them without ever moving your camera dial off Automatic. Understand and get comfortable with these concepts early on and you’ll find the more technical aspects of photography less intimidating. You can also practice Subject and Composition with your camera phone. When you get comfortable The next step in your photographic journey will be lighting. To understand that aspects, you’ll have to move the dial off “A”. We’ll tackle that step next Friday. #photography #tips #photographytips #photo #cameras #canon #nikon #creativeauto #cameratutorials |
Archives
July 2023
Categories
All
|


 RSS Feed